

Start with a 1:5 ratio by weight for a rich, balanced concentrate, then dilute it 1:1 with water or milk before you drink it. If you’d rather skip the dilution step and make something ready to sip straight from the fridge, go with 1:12 to 1:15. Both are backed by the same logic: cold brew pulls flavor slowly, so a little coffee goes a long way.
Here’s a 1-quart concentrate you can start tonight: combine 90 grams of coarsely ground coffee (about ¾ cup) with 450 grams of cold, filtered water (roughly 1 pint 7 ounces) in a jar. Stir until every ground is saturated, cover, and steep at room temperature or in the fridge.
- Concentrate (1:5): 90 g coffee + 450 g water = strong base, dilute before drinking
- Ready-to-drink (1:14): 65 g coffee + 910 g water = pour over ice and go
Expect the concentrate to taste bold, almost syrupy, and slightly bitter on its own. That’s normal. Once you cut it 1:1 with water, milk, or a splash of oat milk, it should mellow into something smooth and chocolatey. If it still tastes weak after dilution, use less water next time. Too sharp? Add a touch more water or steep a shorter batch next round.
Key Takeaways
A precise, weight-based ratio, coarse grind, and a 12 to 18 hour steep together determine whether cold brew tastes balanced or bitter.
| Point | Details |
|---|---|
| Start with 1:5 concentrate | Combine 90 g coffee with 450 g water, then dilute 1:1 before drinking. |
| Choose ready-to-drink for simplicity | Use a 1:12 to 1:15 ratio if you’d rather skip the dilution step entirely. |
| Grind coarse, always | A texture like sea salt prevents sediment and bitter over-extraction. |
| Steep 12 to 18 hours | Shorter steeps taste cleaner; longer steeps add body but risk bitterness. |
| Store concentrate up to 14 days | Ready-to-drink lasts only 5 to 7 days since it’s already diluted. |
Table of Contents
- Concentrate vs. Ready-to-Drink: Which Cold Brew Ratio Fits Your Life?
- Cold Brew Ratio Chart for Every Jar Size
- How Do You Measure and Scale a Cold Brew Recipe?
- Why Grind Size and Steep Time Change Everything
- Step-by-Step: Brewing Cold Brew in a Jar or French Press
- How Do You Dilute Cold Brew Concentrate for Serving?
- Fixing a Bad Batch: Quick Cold Brew Troubleshooting
- How Long Does Cold Brew Last in the Fridge?
- Where to Find More Cold Brew Guidance from EcoVibe Roast
- An Honest Take on Cold Brew Ratios
- Sources
Concentrate vs. Ready-to-Drink: Which Cold Brew Ratio Fits Your Life?
Concentrate ratios typically run 1:4 to 1:8, while ready-to-drink batches land around 1:12 to 1:15. Serious Eats’ guide to cold brew uses a similar approach, steeping roughly 12 ounces of coffee in 64 ounces of water for a strong concentrate meant to be cut with water before serving. That’s close to a 1:5 ratio once you account for the dilution step.
Concentrate wins on flexibility. A quart takes up less fridge space than a gallon of ready-to-drink brew, and you control the final strength cup by cup. Want it stronger one morning and lighter the next? Just change the pour. Ready-to-drink, on the other hand, skips the math entirely. Pour, add ice, done.
- Concentrate: more shelf-stable, flexible strength, takes up less fridge room
- Ready-to-drink: zero dilution needed, but finishes faster and takes more space
- Flavor comparison: a diluted 1:5 concentrate lands close to a 1:15 hot-brew equivalent, similar to the 1:15 to 1:18 range most drip coffee recipes use
If you brew often and like variety, concentrate is the smarter default. If you just want a pitcher of cold coffee waiting for you, ready-to-drink saves a step.
Cold Brew Ratio Chart for Every Jar Size
Once you know your target ratio, scaling it up or down is just multiplication. This chart covers the most common cold brew ratios home brewers ask about, from bold concentrate to sippable ready-to-drink batches.
| Ratio | Coffee (grams) | Water (grams/ml) | Best For |
|---|---|---|---|
| 1:4 | 100 g | 450 g | Ultra-strong concentrate, heavy dilution |
| 1:5 | 90 g | 450 g | Standard concentrate, dilute 1:1 |
| 1:6 | 90 g | 450 g | Forgiving concentrate for beginners |
| 1:8 | 65 g | 450 g | Lighter concentrate, less dilution needed |
| 1:12 | 60 g | 910 g | Bolder ready-to-drink |
| 1:15 | 65 g | 910 g | Gentle ready-to-drink, sip straight |
A 1:6 concentrate is a smart place to land if 1:5 tastes too intense once diluted, since it’s more forgiving than 1:4 and rarely turns harsh. That guidance lines up with what JayArr Coffee’s cold brew concentrate guide recommends for new brewers still dialing in their preference.
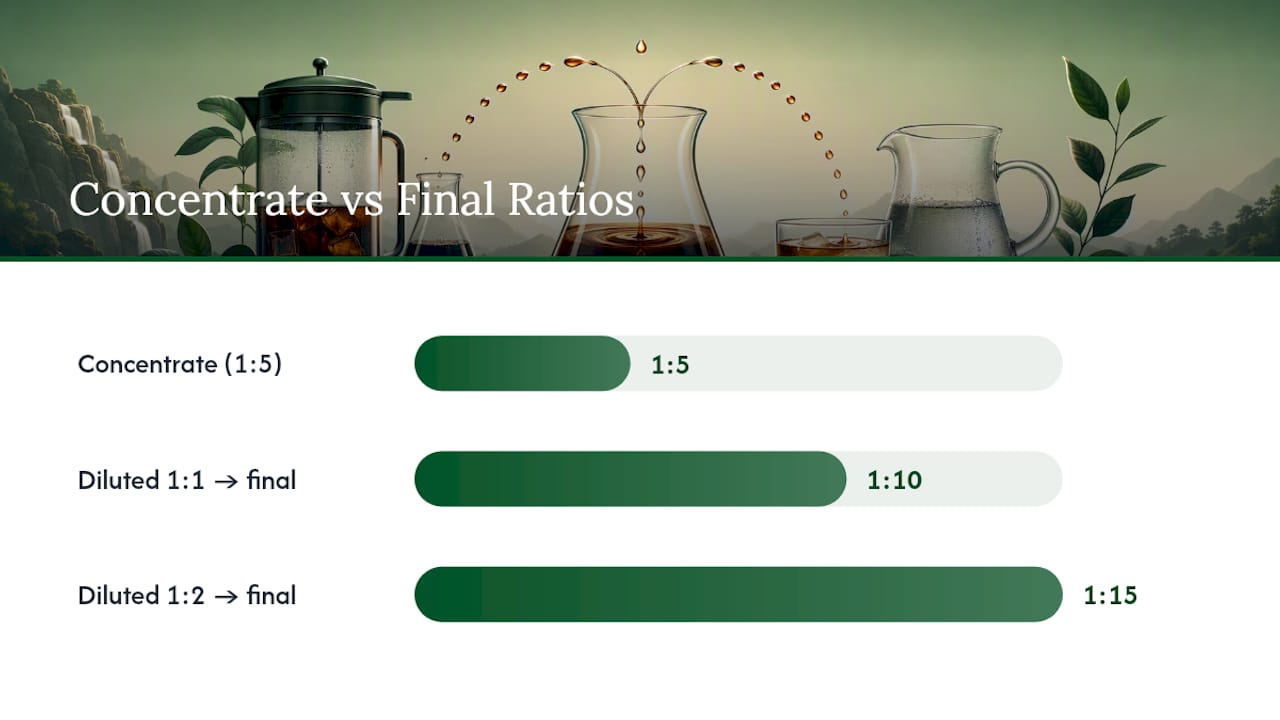
Diluting a 1:5 concentrate 1:1 gets you roughly a 1:10 final cup, and cutting it 1:2 (one part concentrate to two parts water) pushes it closer to 1:15. Calculators like The Coffee Ratio’s cold brew tool make this conversion painless if you’re scaling odd batch sizes. No scale handy? A rough approximation is 1 tablespoon of coffee per ounce of water for concentrate, though weight will always be more consistent than scoops.
How Do You Measure and Scale a Cold Brew Recipe?
A kitchen scale removes almost all the guesswork from cold brew, mostly because 1 gram of water equals 1 milliliter. That means you can measure water by weight or volume interchangeably, no conversion chart required.
The formula is simple:
- Coffee (g) = Water (g) ÷ Ratio number. For a 1:5 ratio with 500 g water, that’s 500 ÷ 5 = 100 g coffee.
- Small batch example: 300 g water ÷ 5 = 60 g coffee for a single-serving jar.
- Gallon batch example: roughly 3,800 g water ÷ 12 = about 317 g coffee for a full gallon of ready-to-drink brew.
- Tare your scale before adding coffee, then again before adding water, so each measurement starts at zero.
- Round to the nearest gram. Cold brew is forgiving enough that a gram or two won’t ruin a batch.
Volumetric measuring (cups, tablespoons) works fine in a pinch, and Simply Recipes’ approach of 1 cup beans to 4 cups water proves it. But scoops vary depending on grind size and bean density, so a scale gives you the same cup every time.
Why Grind Size and Steep Time Change Everything
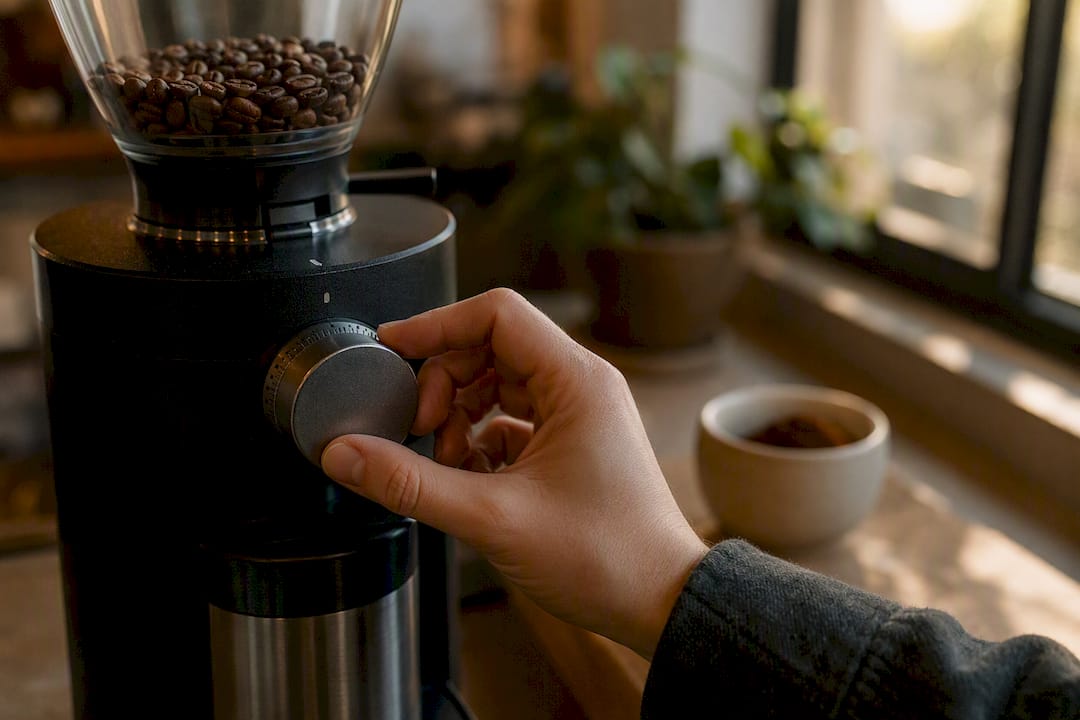
Grind size and steep time are the two variables that decide whether your cold brew tastes clean or muddy, even at the exact same ratio. A coarse grind, similar in texture to sea salt, is non-negotiable here. Fine grind particles slip through most filters, leaving gritty sediment, and they also over-extract during a long steep, pulling out bitter compounds that a shorter hot brew never touches.
Steep time typically falls between 12 and 18 hours. Here’s how that window plays out:
- 12 hours: cleaner, brighter flavor with less body
- 18 hours: fuller, richer flavor with more risk of bitterness
- Past 24 hours: diminishing returns and a higher chance of an over-extracted, harsh cup
Room-temperature steeping extracts faster than fridge steeping, so if you’re brewing on the counter, lean toward the shorter end of that range. Fridge steeps can comfortably stretch toward 18 hours since the cold slows extraction. If you’re using a stronger ratio like 1:4, shorten your steep slightly since there’s less water to buffer the extraction. Weaker ratios like 1:15 can handle the full 18 hours without turning bitter.
Pro Tip: If your cold brew tastes flat no matter what, check your grind first. A pre-ground bag labeled “coarse” from the grocery store is sometimes closer to medium, and that alone can throw off an otherwise perfect ratio. A grind size guide can help you dial in the right texture on your own grinder.
Step-by-Step: Brewing Cold Brew in a Jar or French Press
The jar method is the most common way to make cold brew at home, and it barely requires any equipment.
- Grind your coffee coarse, similar to breadcrumbs or sea salt.
- Combine the grounds and cold, filtered water in a large jar using your chosen ratio.
- Stir thoroughly so every ground gets saturated. Dry pockets of grounds won’t extract evenly.
- Cover the jar and steep for 12 to 18 hours in the fridge or at room temperature.
- Filter through a paper filter, fine mesh strainer, or several layers of cheesecloth to remove sediment.
A French press works almost the same way, with one advantage: the built-in mesh plunger doubles as your filter. Add grounds and water directly to the press, stir, and let it steep uncovered or with the lid resting on top (not plunged). After steeping, plunge slowly to avoid forcing fine particles through the mesh, then pour off the liquid and run it through a paper filter for a clearer final result. Starbucks’ coffee press brewing guide uses this same slow-plunge method with a 4-tablespoon-per-6-ounce ratio as a scoop-based starting point.
- Cheesecloth: fast, but lets some fine sediment through
- Paper filter: slowest, but produces the clearest concentrate
- Fine mesh strainer: good middle ground, especially double-strained
For a full walkthrough with troubleshooting built in, Ecoviberoast’s step-by-step cold brew recipe covers the same jar method with additional tips for smoothing out the finish.
How Do You Dilute Cold Brew Concentrate for Serving?
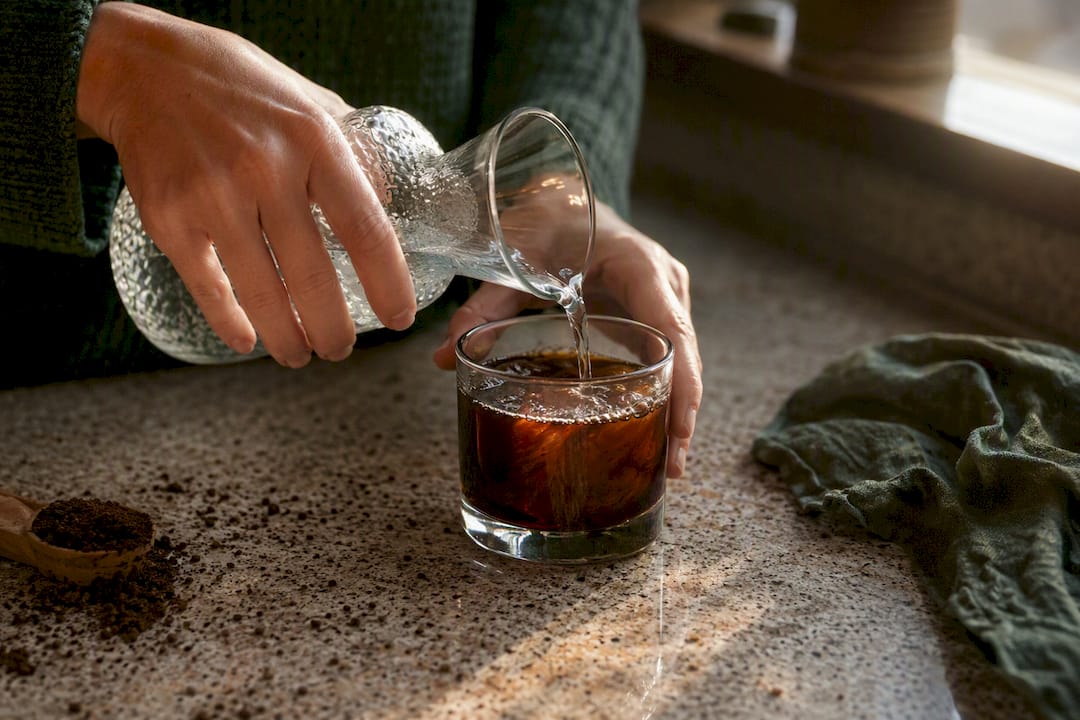
The standard starting point is 1:1, one part concentrate to one part water or milk. That turns a 1:5 concentrate into roughly a 1:10 final cup, smooth enough to drink over ice without feeling watery.
- Classic iced coffee: 60 ml concentrate + 60 ml water + ice
- Cold latte: 60 ml concentrate + 60 ml milk of choice + ice
- Cocktail base: 30 ml concentrate mixed into a cold brew espresso martini or coffee old fashioned
Keep in mind that ice melts as you drink, quietly diluting your cup further, so it’s fine to start slightly stronger than you want the final sip to be. Oat milk and whole milk both mellow acidity nicely, while unsweetened almond milk keeps things lighter. If you’re using concentrate in a mixed drink, skip extra dilution altogether. The other ingredients usually add enough liquid on their own.
Fixing a Bad Batch: Quick Cold Brew Troubleshooting
Most cold brew problems trace back to one of three things: ratio, grind, or steep time. Here’s how to diagnose fast.
- Tastes bitter: grind coarser next time, or shorten your steep by a few hours
- Tastes weak or watery: use less dilution water, or brew a stronger concentrate (try 1:4 instead of 1:6)
- Gritty or sediment-heavy: grind coarser and add a paper filter step after your initial strain
- Flat, no real coffee flavor: check that your grind is actually coarse, not just labeled that way, and confirm your water saturated all the grounds during stirring
Community threads like r/Coffee’s cold brew ratio discussion show just how much personal preference varies here, which is exactly why starting from a baseline ratio and adjusting one variable at a time works better than guessing from scratch.
Pro Tip: Before you dump a disappointing batch, try diluting it differently first. A concentrate that tastes harsh at 1:1 might taste great at 1:2. That’s often a five-second fix instead of a wasted pound of coffee.
How Long Does Cold Brew Last in the Fridge?
Concentrate holds up well, often staying fresh for 10 to 14 days in the fridge when stored properly. Ready-to-drink cold brew, since it’s already diluted, has a shorter window of about 5 to 7 days before the flavor starts flattening out.
- Store in airtight glass containers, not plastic, to keep flavor from picking up off notes
- Label the jar with the brew date and dilution state (concentrate vs. ready-to-drink) so you don’t lose track
- Watch for cloudiness, an off smell, or a sour taste as your signal to toss a batch early
- Diluted batches spoil faster than concentrate, so only mix what you’ll drink within a few days
Brewing smaller, more frequent batches of concentrate tends to beat one giant gallon that slowly loses its punch by day ten.
Where to Find More Cold Brew Guidance from EcoVibe Roast
Ecoviberoast built its brewing resources around the same gram-first philosophy this guide follows, so you’re not guessing your way through a second recipe with different advice. The grind size guide and types of coffee grinds breakdown both dig deeper into dialing in texture for any grinder you own.
- Low-acid brewing: the best low acid coffee guide helps if cold brew’s smoothness still isn’t cutting the acidity you’re after
- Step-by-step recipe: the full cold brew coffee walkthrough pairs well with the ratios here
- Beans built for it: Ecoviberoast’s cold brew coffee is sourced and roasted with chocolate, toffee, and floral notes that hold up beautifully over a long, slow steep
Every bag sold also supports mangrove planting and ocean-bound plastic removal, so your cold brew habit does a little good beyond your own mug.
An Honest Take on Cold Brew Ratios
The obsession with finding “the one perfect ratio” misses the point. Cold brew is more forgiving than espresso or pour-over, and the ratio matters less than most guides pretend. What actually separates a great batch from a mediocre one is consistency: same grind, same steep window, same starting ratio, every time you brew.
Most home brewers chase strength when their real problem is variability. One week they eyeball the coffee, the next they use a different bag with a different grind, and then they blame the ratio when the result tastes off. Weighing your coffee and water solves more problems than switching from 1:5 to 1:6 ever will.
If you take one thing from this guide, let it be this: pick a ratio, weigh it precisely for three batches in a row, and only then decide if you actually need to change it. Most people quit adjusting after one inconsistent brew and never find out their original ratio was fine all along.
— LaSaundra
Sources
- Guide to Cold Brew (Serious Eats)
- Cold brew concentrate guide (JayArr Coffee)
- Cold Brew Coffee Ratio Calculator (The Coffee Ratio)
- How To Make Cold Brew Coffee (Simply Recipes)


